I enjoy creating digital illustrations and like both vector illustrations (Illustrator) and pixel based images (Procreate or Photoshop).
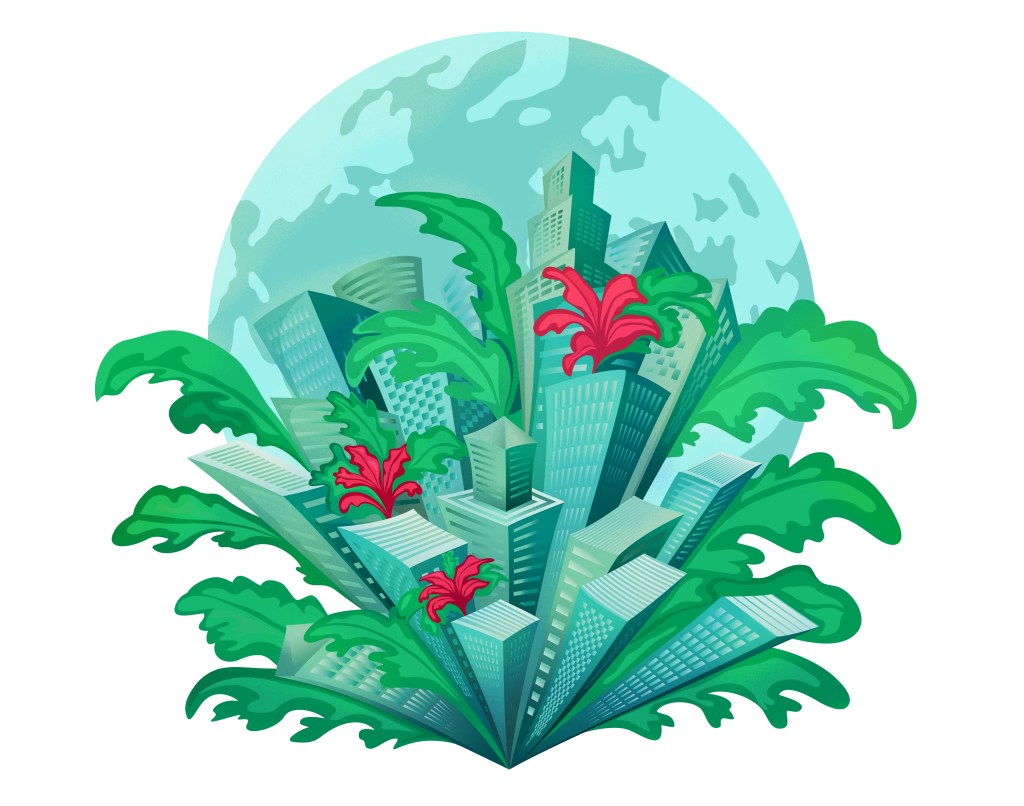
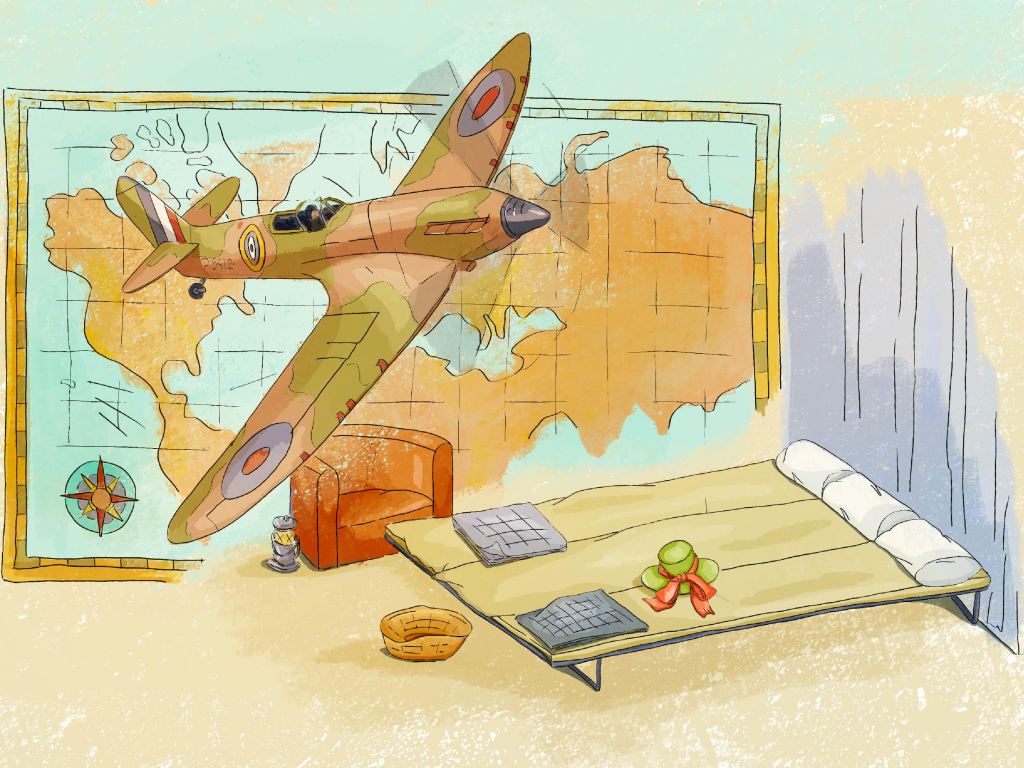
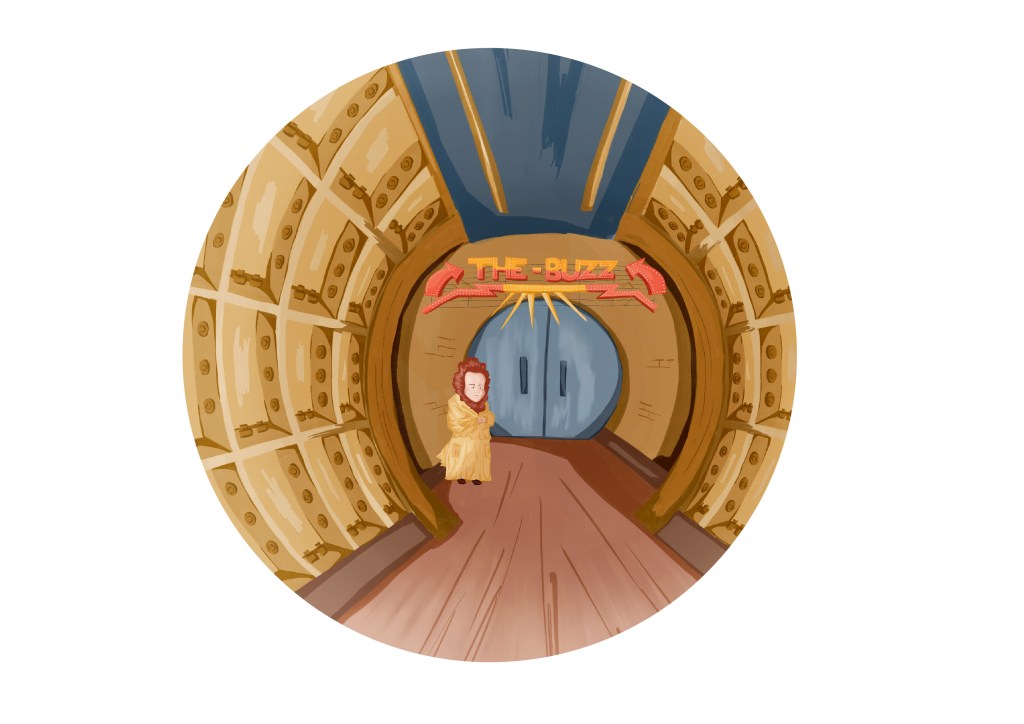
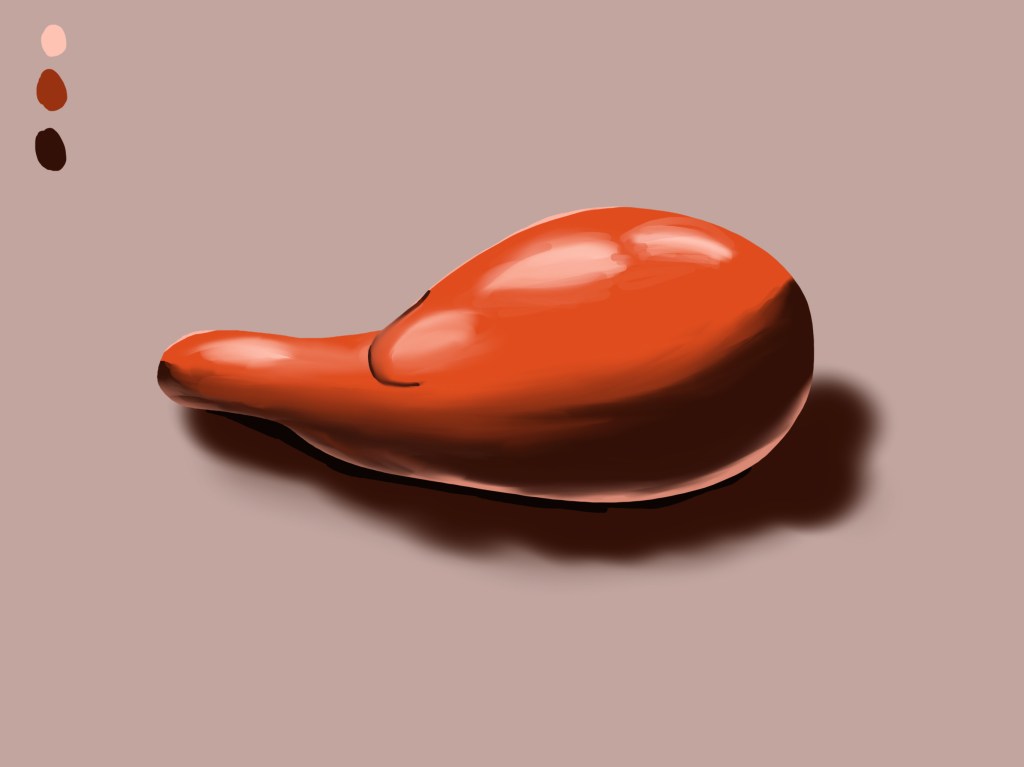
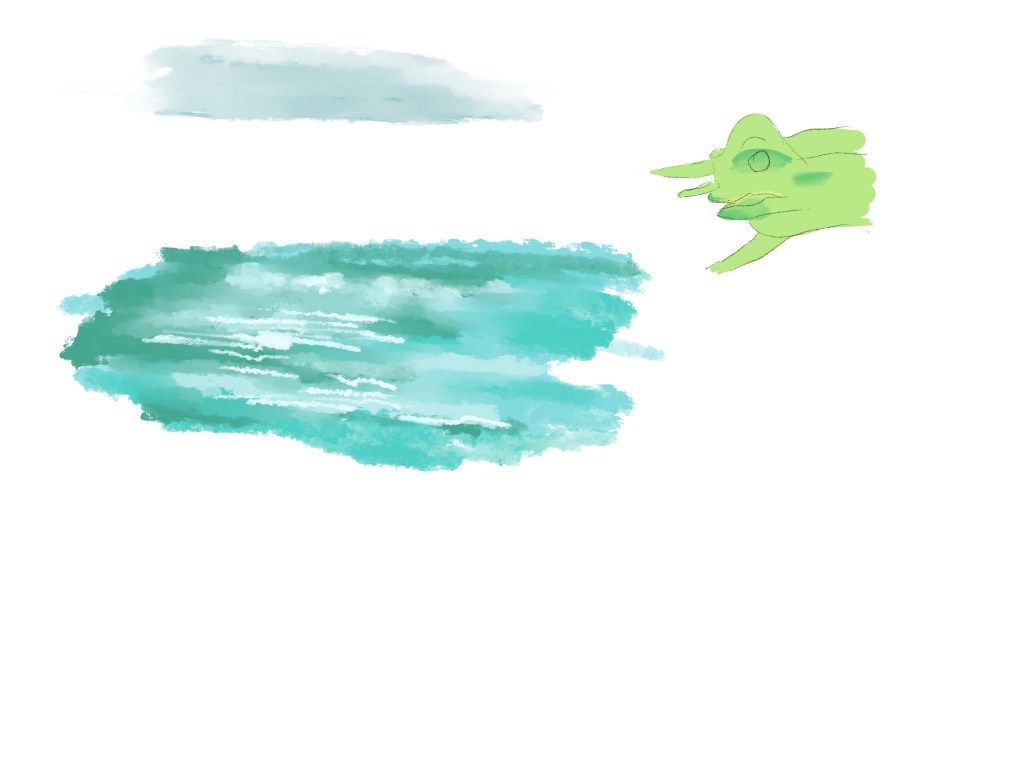
I feel fairly confident with the process when I create vector illustrations with solid shapes to illustrate highlights and shadows (see image #1). However, when I paint in Photoshop or Procreate, I find it more challenging (see image #2 and 3). I hesitate between different techniques, and the outcome can feel like some in-between solutions. I often use black outlines (#2), sometimes because I like that style, but sometimes because I do not trust myself to paint with enough contrast.
Research on digital illustrations
I decided to look again at different types of digital illustrations to have a better idea of what I like and what I would like to achieve.
I analysed many illustrations (I saved a few on a Pinterest board) to understand the main elements to consider when creating a digital illustration. This is how I have summarised what I have found:
- Will the picture be painted in a way similar to a traditional painted illustration?
- Will it include outlines, a technique often used in cartoons like Tintin (even if Tintin’s illustrations were not created digitally)? Will these lines be black or in a different colour?
- How realistic will the illustration be? (it can be photorealistic, or look more like a painting or a vector illustration).
- Would it contain a lot of texture or be smooth and how will this texture be achieved (with special brushes or digital layers or more traditional painting techniques)?
- How “digital” will it look (use of a special brush in a shape of leaves for instance vs. a traditional brush to draw the foliage)?
When I looked at this list, I realised that all these elements could be used in different degrees, resulting in an infinity of outcomes.
Research on techniques
I watched many YouTube videos and websites to understand different techniques and approaches, to work out how and where to start when I am about to render an illustration. It was helpful to see how digital artists work. Some of the more useful videos were:
How I Paint Environment Concept Art ( Digital Painting Tutorial ) – Victor Staris (https://www.youtube.com/watch?v=6rDvySo4x6I): Uses a variety of brushes and layers of colours to create texture and depth.
PROCREATE Landscape DRAWING Tutorial in EASY Steps – Secret Forest Hut – James Julier Art Tutorials (https://www.youtube.com/watch?v=e7qtC_e8Jxc&t=1723s): interesting techniques to paint foliage and light.
Full Procreate painting process from start to finish [PINK] – angrymikko (https://www.youtube.com/watch?v=nlPXM1JmzhI): I watched a few videos created by this artist – He paints in a very organic and intuitive way and builds depth and contrast with impressive results.
I also revisited a course I had done with Udemy (The Digital Painting MEGA Course: Beginner to Advanced – Austin Batchelor).
While watching these videos, I experimented in Procreate:


At that stage, I still felt that I did not know where to start. I tried to understand what was stopping me and realised that there are so many techniques with so many potential outcomes that I had to make a choice. Also I probably expected too much from this exercise as this is a long-term process.
However, I could look at the elements I had identified that would determine the style of a digital illustration and decide on what I would like to focus on right now.
I would like to create painted illustrations without black outlines. I like when the brush strokes are visible in a similar way to traditional painting and when the mixing of colours is not too smooth. In a sense, I am looking for an outcome that has some similarities with traditional painting but with a digital feel as well.
I therefore decided that my next step would be to use only a few brushes and to concentrate on the layering of colours.
I identified three different images to experiment with. The idea was not to create finished illustrations but more to understand how I would approach an illustration from a technical perspective.
Image #1
I visited the Queen’s House in Greenwich recently and took a photo of the Armada portrait (https://www.rmg.co.uk/whats-on/queens-house/faces-of-a-queen).
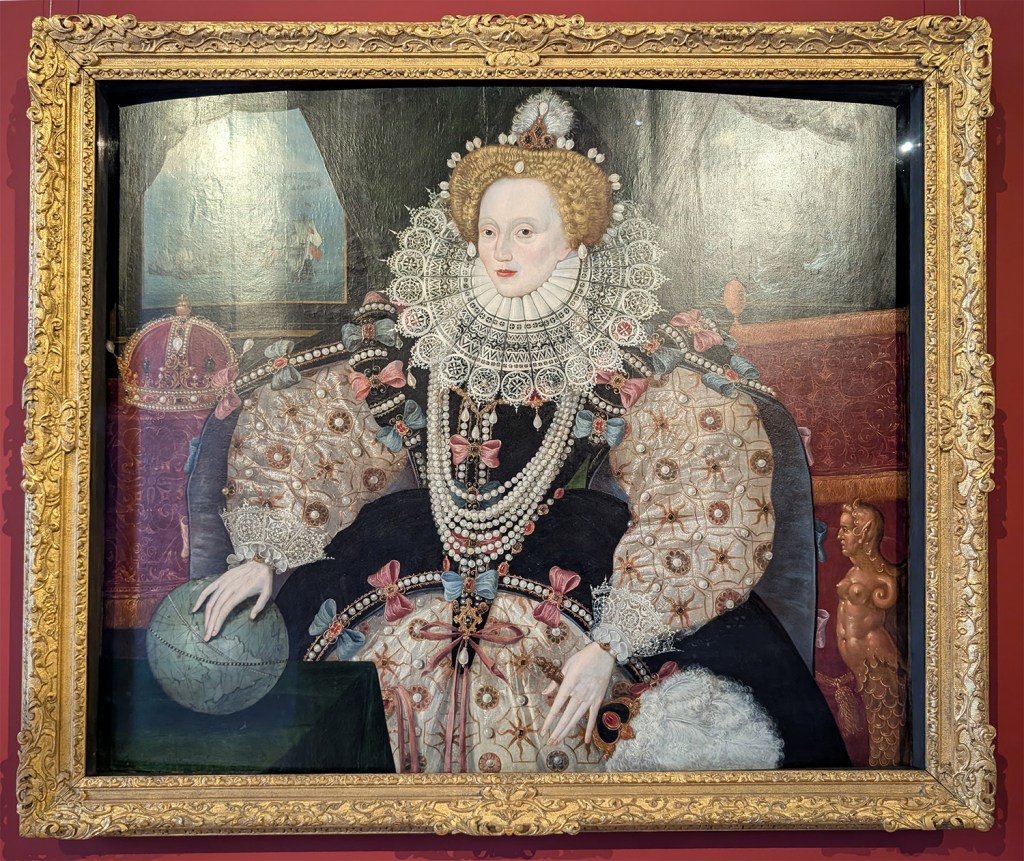

I was interested in the way the fabric and ornaments were rendered and wanted to see how it could be translated digitally. I traced the main oulines in Procreate so as to concentrate straight away on the painting process without having to consider anything else. I used mainly the standard round brush in Procreate
This is the outcome.
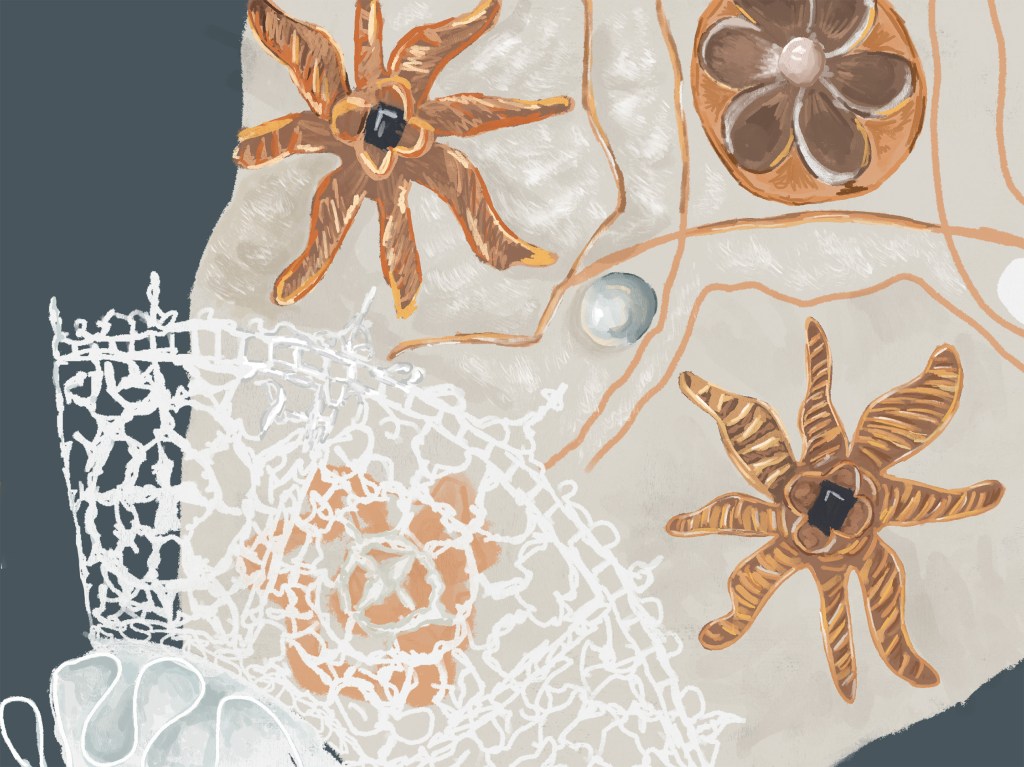
I was a bit disappointed by the outcome as I struggled to render the texture of the thread in the embroidery, but I feel that with some practice, I could improve rapidly.
Image #2
I wanted to see what would happen if I painted one of the illustrations I created earlier without any outline. I took the image with the Millennium bridge and painted over the outlines.
This is the original with the black outlines versus the new version.

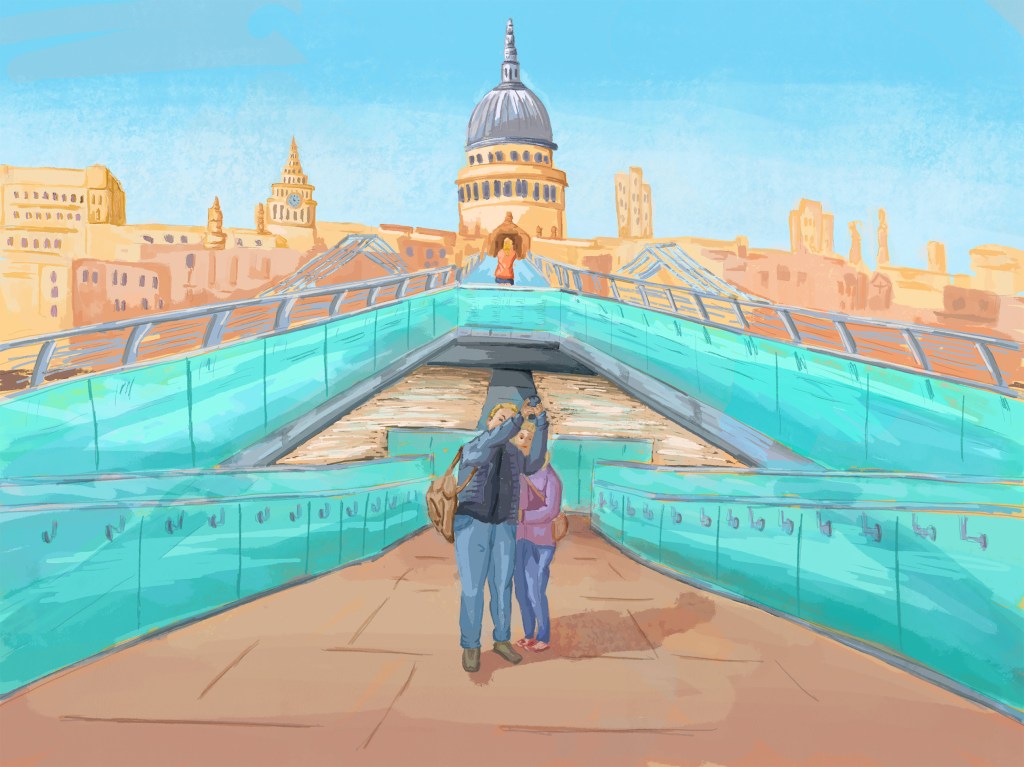
The edited version is not as good as the original with the outline because it was modified afterwards instead of being painted with the right technique from the start. However, it was an interesting experiment because it has enabled me to see that I could paint such a scene with some practice. The bridge area would have needed deeper shadows and highlights as light on glass can create very strong contrast. The characters at the front look a bit smudged and would have needed to be more detailed.
Image #3
I wanted to paint an image with a lot of contrast and texture. I had taken a picture of a bug when I recently visited the Natural History Museum. Because the subject is not very complicated in terms of shapes, I thought that it would be easier to concentrate fully on the painting process.
Again, I used the photograph to trace the main outlines in black in order to focus on the painting. I then painted over the original lines.
This is the picture next to the digital painting.
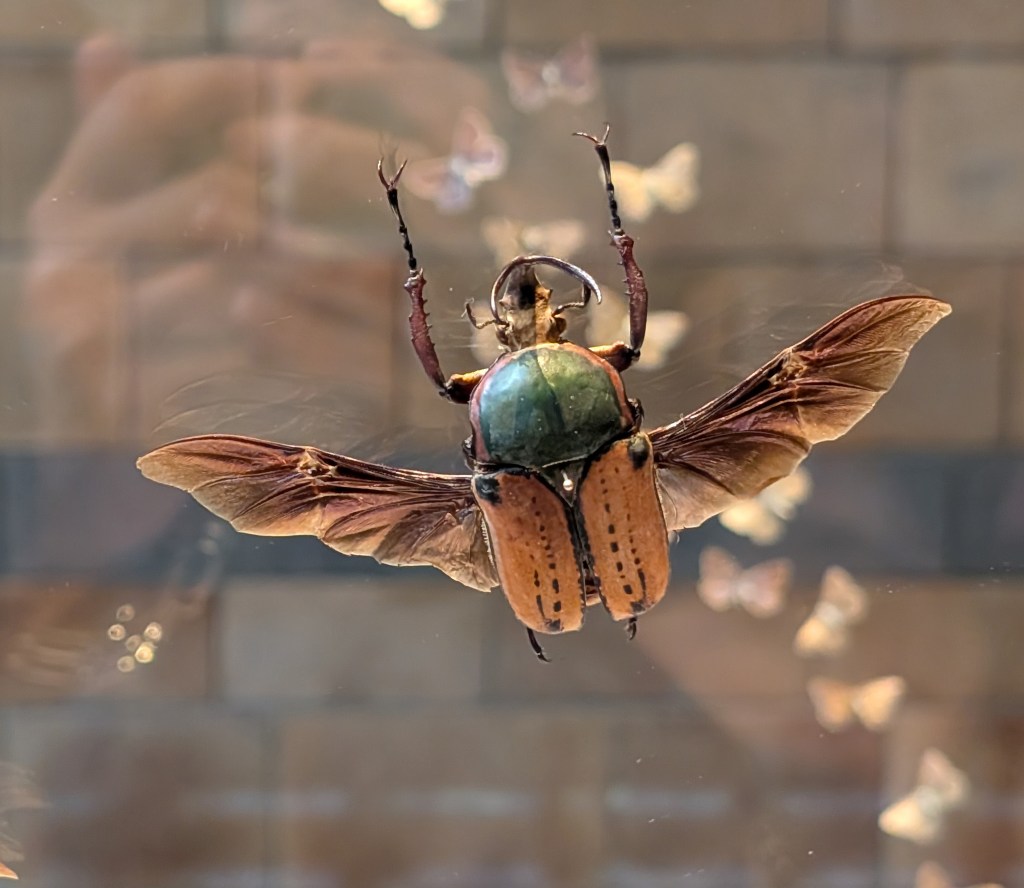

I experimented further with brushes to add some light colour “contamination” between the different parts to make the whole more dynamic.

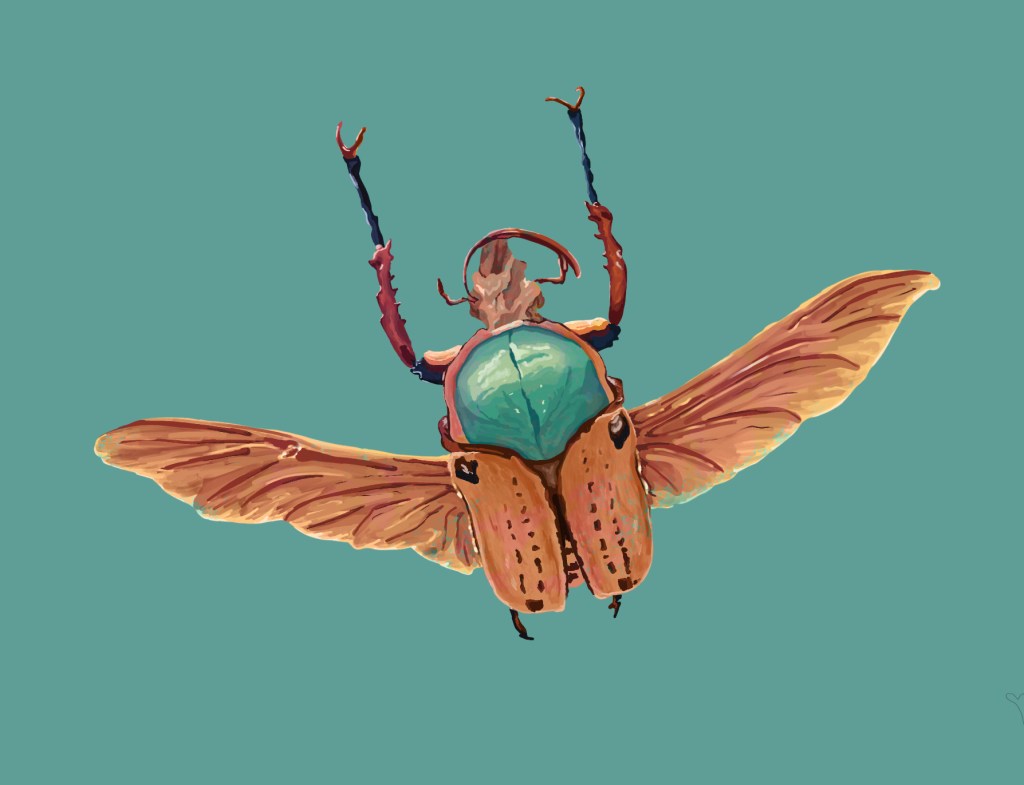
This last exercise was very helpful. Because it was not too intricate, I could concentrate on the contrast, colours and texture. For instance, on the back of the beetle, I wanted the green area to reflect the cracks/veins in the carapace and I feel that I have achieved that.
This section of the project was challenging. At some point, I had the impression that the more I researched the subject, the more confused I was about what I wanted to achieve and how. However, after a while, I started to see a path I could follow to improve my techniques in digital painting.
These images are experiments and were not meant to be finished illustrations. I could have painted the lace with more details in the second image for instance but this would have been very time consuming and I was more interested in understanding the process and the possibilities.
Separating the painting process from the creative process has enabled me to realise what I can do and has given more confidence. It is now easier for me to decide how I will render an illustration digitally. It does not mean that I will not experiment with techniques, brushes and styles but I have a better idea of the consequences of my choices on the outcome.
